标签:Spring class public 事件 监听器 通知 event Event
Spring的事件通知机制是一项很有用的功能,使用事件机制我们可以将相互耦合的代码解耦,从而方便功能的修改与添加。本文我来学习并分析一下Spring中事件的原理。
举个例子,假设有一个添加评论的方法,在评论添加成功之后需要进行修改redis缓存、给用户添加积分等等操作。当然可以在添加评论的代码后面假设这些操作,但是这样的代码违反了设计模式的多项原则:单一职责原则、迪米特法则、开闭原则。一句话说就是耦合性太大了,比如将来评论添加成功之后还需要有另外一个操作,这时候我们就需要去修改我们的添加评论代码了。
在以前的代码中,我使用观察者模式来解决这个问题。不过Spring中已经存在了一个升级版观察者模式的机制,这就是监听者模式。通过该机制我们就可以发送接收任意的事件并处理。
通过一个简单的demo来看看Spring事件通知的使用:
1 |
// 定义一个事件 |
调用EventDemoPublish.publish方法来发布消息,EventDemoListener监听器接收到消息后对消息进行处理,打印出消息的内容:
1 |
receiver hello |
Spring事件通知原理
首先我们跟踪publishEvent方法,这个方法在AbstractApplicationContext类中。
1 |
protected void publishEvent(Object event, @Nullable ResolvableType eventType) {
|
经过上面的分析,我们看到事件是通过applicationEventMulticaster来广播出去的。
applicationEventMulticaster在Spring的启动过程中被建立,我们在之前的文章Spring启动过程分析1(overview)中分析过Spring的启动过程,在核心方法refresh中建立applicationEventMulticaster:
1 |
// Initialize message source for this context. |
关注initApplicationEventMulticaster和registerListeners方法。
1 |
// 初始化事件广播器 |
1 |
// 注册监听器 |
经过前面的分析,我们知道了事件广播器applicationEventMulticaster如何被构建,下面我们分析事件的广播过程。
1 |
@Override |
经过上面的分析,我们知道了Spring如何发送并响应事件。下面我们来分析如何使Spring能够异步响应事件。
异步响应Event
默认情况下,Spring是同步执行Event的响应方法的。如果响应方法的执行时间很长会阻塞发送事件的方法,因此很多场景下,我们需要让事件的响应异步化。
为了更直观地说明Event的响应默认是同步的,我们修改一下EventDemoListener并增加一个EventDemoListener2:
1 |
@Component |
执行结果如下:

执行结果显示:EventDemoListener2和EventDemoListener的执行间隔1秒,EventDemoListener2的执行和程序的结束也间隔1秒。结果表示我们的响应程序是同步执行的,一个响应程序的执行会阻塞下一个响应程序的执行。
自定义SimpleApplicationEventMulticaster
通过前面的代码分析,我们发现如果SimpleApplicationEventMulticaster中的taskExecutor如果不为null,将在taskExecutor中异步执行响应程序。applicationEventMulticaster的新建在initApplicationEventMulticaster方法中,默认情况下它会新建一个SimpleApplicationEventMulticaster,其中的taskExecutor为null。因此想要taskExecutor不为null,我们可以自己手动创建一个SimpleApplicationEventMulticaster然后设置一个taskExecutor。
修改Config类:
1 |
@Configuration |
此时再次执行程序,执行结果如下:

可以看到,EventDemoListener和EventDemoListener2是同时执行的,同时它们的执行没有阻塞主程序的执行。事件的响应做到了异步化。
@Async
前面我们看到,通过手动新建SimpleApplicationEventMulticaster并设置TaskExecutor可以使所有的事件响应程序都在另外的线程中执行,不阻塞主程序的执行。不过这样也带来一个问题,那就是所有的事件响应程序都异步化了,某些场景下我们希望某些关系密切的响应程序可以同步执行另外一些响应程序异步执行。这种场景下,我们就不能简单地新建SimpleApplicationEventMulticaster并设置TaskExecutor。
Spring中提供了一个@Async注解,可以将加上这个注解的方法在另外的线程中执行。通过这个注解我们可以将指定的事件响应程序异步化。
我们修改EventDemoListener,在onApplicationEvent中加上@Async注解;同时修改Config类:
1 |
@Component |
注意Config类中需要加上@EnableAsync注释,并定义TaskExecutor。
执行结果如下:

我们看到,EventDemoListener是在另外的线程中执行的,但是EventDemoListener2仍然在主线程中执行,因此EventDemoListener2阻塞了主线程的执行。
@Async原理
@Async注解可以将方法异步化,下面我们来看看它的原理是什么。
我们在Config类中添加了@EnableAsync注释。@EnableAsync注释引入AsyncConfigurationSelector类,AsyncConfigurationSelector类导入ProxyAsyncConfiguration类,ProxyAsyncConfiguration类新建过程中会新建AsyncAnnotationBeanPostProcessor。
AsyncAnnotationBeanPostProcessor类继承了BeanPostProcessor,当每个Bean新建完成后会调用AsyncAnnotationBeanPostProcessor的postProcessAfterInitialization方法:
1 |
@Override |
postProcessAfterInitialization方法判断bean是否符合要求(方法上是否加了@Async注释),如果符合要求则对bean加上代理,代理类为AnnotationAsyncExecutionInterceptor。
1 |
@Override |
调用我们的方法时首先调用AnnotationAsyncExecutionInterceptor的invoke方法,invoke方法将我们真正的方法包装成一个Callable任务,将这个任务提交到executor中执行。由此达到了将我们的方法异步化的目的。
总结
Spring的事件机制是一套相当灵活的机制,使用它可以简便地将我们的代码解耦从而优化我们的代码。经过前面的分析我们了解了其中的运行原理,这有助于我们更好地使用这套机制。
https://www.jianshu.com/p/21984b08875c
https://juejin.im/post/5aee749bf265da0b71562ac1
https://my.oschina.net/u/2278977/blog/794868
https://blog.wangqi.love/articles/Java/Spring%20Event%E4%BA%8B%E4%BB%B6%E9%80%9A%E7%9F%A5%E6%9C%BA%E5%88%B6.html
Spring Event事件驱动
转载Spring事件驱动模型,简单来说类似于Message-Queue消息队列中的Pub/Sub发布/订阅模式,也类似于Java设计模式中的观察者模式。
自定义事件
Spring的事件接口位于
Copyorg.springframework.context.ApplicationEvent,源码如下:public abstract class ApplicationEvent extends EventObject { private static final long serialVersionUID = 7099057708183571937L; private final long timestamp; public ApplicationEvent(Object source) { super(source); this.timestamp = System.currentTimeMillis(); } public final long getTimestamp() { return this.timestamp; } }继承了Java的事件对象
EventObject,所以可以使用getSource()方法来获取到事件传播对象。自定义Spring事件#
Copypublic class CustomSpringEvent extends ApplicationEvent { private String message; public CustomSpringEvent(Object source, String message) { super(source); this.message = message; } public String getMessage() { return message; } }然后定义事件监听器,该监听器实际上等同于消费者,需要交给Spring容器管理。
Copy@Component public class CustomSpringEventListener implements ApplicationListener<CustomSpringEvent> { @Override public void onApplicationEvent(CustomSpringEvent event) { System.out.println("Received spring custom event - " + event.getMessage()); } }最后定义事件发布者
Copy@Component public class CustomSpringEventPublisher { @Autowired private ApplicationEventPublisher applicationEventPublisher; public void doStuffAndPublishAnEvent(final String message) { System.out.println("Publishing custom event. "); CustomSpringEvent customSpringEvent = new CustomSpringEvent(this, message); applicationEventPublisher.publishEvent(customSpringEvent); } }创建测试类
Copy@RunWith(SpringRunner.class) @SpringBootTest public class CustomSpringEventPublisherTest { @Autowired private CustomSpringEventPublisher publisher; @Test public void publishStringEventTest() { publisher.doStuffAndPublishAnEvent("111"); } }运行测试类,可以看到控制台打印了两条重要信息
Copy//发布事件 Publishing custom event. //监听器得到了事件,并相应处理 Received spring custom event - 111由于Spring事件是发布/订阅的模式,而发布订阅模式有以下三种情况
- 1生产者 - 1消费者
- 1生产者 - 多消费者
- 多生产者 - 多消费者
上面举的例子是第一种情况,我们来试试其他两个情况
继续创建一个事件监听器作为消费者:
Copy@Component public class CustomSpringEventListener2 implements ApplicationListener<CustomSpringEvent> { @Override public void onApplicationEvent(CustomSpringEvent event) { System.out.println("CustomSpringEventListener2 Received spring custom event - " + event.getMessage()); } }运行测试类后,可以观察到,控制台顺序打印了两条消费信息:
CopyPublishing custom event. CustomSpringEventListener1 Received spring custom event - 111 CustomSpringEventListener2 Received spring custom event - 111说明,Spring的发布订阅模式是广播模式,所有消费者都能接受到消息,并正常消费
再试试第三种多生产者 - 多消费者的情况
继续创建一个发布者,
Copy@Component public class CustomSpringEventPublisher2 { @Autowired private ApplicationEventPublisher applicationEventPublisher; public void doStuffAndPublishAnEvent(final String message) { System.out.println("CustomSpringEventPublisher2 Publishing custom event. "); CustomSpringEvent customSpringEvent = new CustomSpringEvent(this, message); applicationEventPublisher.publishEvent(customSpringEvent); } }控制台输出:
CopyCustomSpringEventPublisher Publishing custom event. CustomSpringEventListener1 Received spring custom event - 111 CustomSpringEventListener2 Received spring custom event - 111 CustomSpringEventPublisher2 Publishing custom event. CustomSpringEventListener1 Received spring custom event - 222 CustomSpringEventListener2 Received spring custom event - 222从以上输出内容,我们可以猜测到,Spring的事件发布订阅机制是同步进行的,也就是说,事件必须被所有消费者消费完成之后,发布者的代码才能继续往下走,这显然不是我们想要的效果,那有没有异步执行的事件呢?
Spring中的异步事件
要使用Spring 的异步事件,我们需要自定义异步事件配置类
Copy@Configuration public class AsynchronousSpringEventsConfig { @Bean(name = "applicationEventMulticaster") public ApplicationEventMulticaster simpleApplicationEventMulticaster() { SimpleApplicationEventMulticaster eventMulticaster = new SimpleApplicationEventMulticaster(); eventMulticaster.setTaskExecutor(new SimpleAsyncTaskExecutor()); return eventMulticaster; } }发布和订阅的代码不用变动,直接运行测试类,控制台将打印出:
CopyCustomSpringEventPublisher Publishing custom event. CustomSpringEventPublisher2 Publishing custom event. CustomSpringEventListener1 Received spring custom event - 111 CustomSpringEventListener2 Received spring custom event - 111 CustomSpringEventListener2 Received spring custom event - 222 CustomSpringEventListener1 Received spring custom event - 222可以看到,两个发布者几乎同时运行,证明监听器是异步执行的,没有阻塞住发布者的代码。准确的说,监听器将在一个单独的线程中异步处理事件。
Spring自带的事件类型
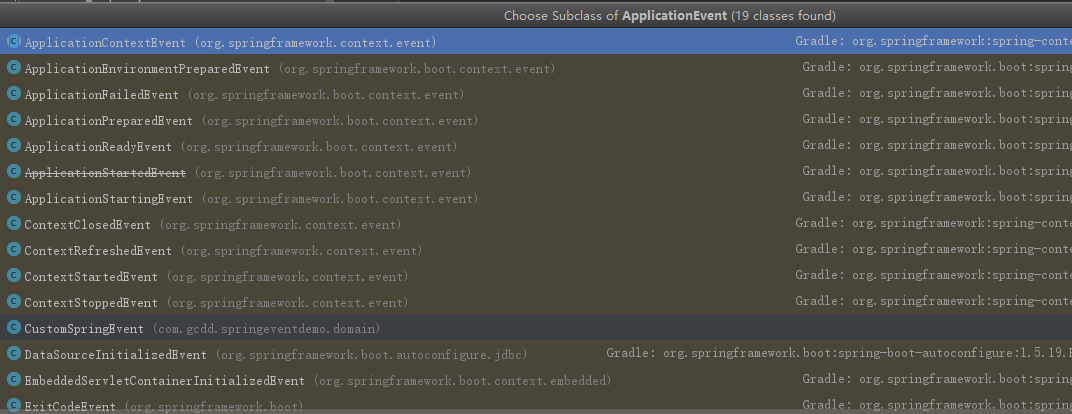
事件驱动在Spring中是被广泛采用的,我们查看ApplicationEvent的子类可以发现许多Event事件,在此不赘述。
注解驱动的监听器
从Spring 4.2开始,事件监听器不需要是实现
CopyApplicationListener接口的bean,它可以通过@EventListener注解在任何被Spring容器管理的bean的公共方法上。@Component public class AnnotationDrivenContextStartedListener { @EventListener public void handleContextStart(CustomSpringEvent cse) { System.out.println("Handling Custom Spring Event."); } }控制台输出结果:
CopyCustomSpringEventPublisher Publishing custom event. Handling Custom Spring Event. CustomSpringEventPublisher2 Publishing custom event. Handling Custom Spring Event.同样的,我们可以看出,这个事件监听器是同步执行的,如果要改为异步监听器,在事件方法上加上
Copy@Async,并且在Spring应用中开启异步支持(在SpringBootApplication上添加@EnableAsync)。@Component public class AnnotationDrivenContextStartedListener { @Async @EventListener public void handleContextStart(CustomSpringEvent cse) { System.out.println("Handling Custom Spring Event."); } }再次运行测试类:
CopyCustomSpringEventPublisher Publishing custom event. CustomSpringEventPublisher2 Publishing custom event. Handling Custom Spring Event. Handling Custom Spring Event.泛型支持
创建一个通用泛型事件模型
Copy@Data public class GenericSpringEvent<T> { private T message; protected boolean success; public GenericSpringEvent(T what, boolean success) { this.message = what; this.success = success; } }注意
GenericSpringEvent和CustomSpringEvent之间的区别。我们现在可以灵活地发布任何任意事件,并且不再需要从ApplicationEvent扩展。这样的话,我们无法像之前一样,通过继承
ApplicationListener的方式来定义一个监听器,因为ApplicationListener定义了事件必须是ApplicationEvent的子类。所以,我们只能使用注解驱动的监听器。通过在
Copy@EventListener注释上定义布尔SpEL表达式,也可以使事件监听器成为条件。在这种情况下,只会为成功的String的GenericSpringEvent调用事件处理程序:@Component public class AnnotationDrivenEventListener { @EventListener(condition = "#event.success") public void handleSuccessful(GenericSpringEvent<String> event) { System.out.println("Handling generic event (conditional)."); } }定义具体类型的事件:
Copypublic class StringGenericSpringEvent extends GenericSpringEvent<String> { public StringGenericSpringEvent(String message, boolean success) { super(message, success); } }定义发布者:
Copy@Component public class StringGenericSpringEventPublisher { @Autowired private ApplicationEventPublisher applicationEventPublisher; public void doStuffAndPublishAnEvent(final String message, final boolean success) { System.out.println("CustomSpringEventPublisher Publishing custom event. "); StringGenericSpringEvent springEvent = new StringGenericSpringEvent(message, success); applicationEventPublisher.publishEvent(springEvent); } }测试类:
Copy@RunWith(SpringRunner.class) @SpringBootTest public class CustomSpringEventPublisherTest { @Autowired private StringGenericSpringEventPublisher publisher; @Test public void publishStringEventTest() { publisher.doStuffAndPublishAnEvent("success", true); publisher.doStuffAndPublishAnEvent("failed", false); } }运行结果:
CopyCustomSpringEventPublisher Publishing custom event. Handling generic event (conditional) success CustomSpringEventPublisher Publishing custom event.监听器只处理了成功的事件,成功忽略掉了失败的事件。这样的好处是,可以为同一个事件定义成功和失败不同的操作。
Spring事件的事务绑定
从Spring 4.2开始,框架提供了一个新的
@TransactionalEventListener注解,它是@EventListener的扩展,允许将事件的侦听器绑定到事务的一个阶段。绑定可以进行以下事务阶段:
- AFTER_COMMIT(默认的):在事务成功后触发
- AFTER_ROLLBACK:事务回滚时触发
- AFTER_COMPLETION:事务完成后触发,不论是否成功
- BEFORE_COMMIT:事务提交之前触发
总结
- Spring中处理事件的基础知识:创建一个简单的自定义事件,发布它,然后在监听器中处理它。
- 在配置中启用事件的异步处理。
- Spring 4.2中引入的改进,例如注释驱动的侦听器,更好的泛型支持以及绑定到事务阶段的事件。
标签:Spring,class,public,事件,监听器,通知,event,Event 来源: https://www.cnblogs.com/Chary/p/14308749.html
本站声明: 1. iCode9 技术分享网(下文简称本站)提供的所有内容,仅供技术学习、探讨和分享; 2. 关于本站的所有留言、评论、转载及引用,纯属内容发起人的个人观点,与本站观点和立场无关; 3. 关于本站的所有言论和文字,纯属内容发起人的个人观点,与本站观点和立场无关; 4. 本站文章均是网友提供,不完全保证技术分享内容的完整性、准确性、时效性、风险性和版权归属;如您发现该文章侵犯了您的权益,可联系我们第一时间进行删除; 5. 本站为非盈利性的个人网站,所有内容不会用来进行牟利,也不会利用任何形式的广告来间接获益,纯粹是为了广大技术爱好者提供技术内容和技术思想的分享性交流网站。