标签:管理 dev cs lnh lnh1 LVM tmpfs root
LVM管理
目录
lvm管理
部署lvm
格式化逻辑卷(刚刚创建出来的):mkfs.ext4格式、还是xfs_growfs 格式都可以
[root@lnh ~]# lsblk
NAME        MAJ:MIN RM  SIZE RO TYPE MOUNTPOINT
sda           8:0    0  100G  0 disk
├─sda1        8:1    0    1G  0 part /boot
└─sda2        8:2    0   99G  0 part
  ├─cs-root 253:0    0 65.2G  0 lvm  /
  ├─cs-swap 253:1    0    2G  0 lvm  [SWAP]
  └─cs-home 253:2    0 31.8G  0 lvm  /home
sdb           8:16   0    5G  0 disk
sdc           8:32   0    5G  0 disk
sdd           8:48   0    5G  0 disk
sde           8:64   0    5G  0 disk
sr0          11:0    1    9G  0 rom
//查看一下磁盘
[root@lnh ~]# pvcreate /dev/sd{d,e}   //创建物理卷
  Physical volume "/dev/sdd" successfully created.
  Physical volume "/dev/sde" successfully created.
[root@lnh ~]# pvs          //查看物理卷
  PV         VG Fmt  Attr PSize   PFree
  /dev/sda2  cs lvm2 a--  <99.00g    0
  /dev/sdd      lvm2 ---    5.00g 5.00g
  /dev/sde      lvm2 ---    5.00g 5.00g
[root@lnh ~]# vgcreate lnh /dev/sd{d,e} //创建卷组
  Volume group "lnh" successfully created
[root@lnh ~]# vgs     //查看卷组
  VG  #PV #LV #SN Attr   VSize   VFree
  cs    1   3   0 wz--n- <99.00g    0
  lnh   2   0   0 wz--n-   9.99g 9.99g
[root@lnh ~]# lvcreate -n lnh1 -L 3G lnh  //创建逻辑卷
  Logical volume "lnh1" created.
[root@lnh ~]# lvs        //查看逻辑卷
  LV   VG  Attr       LSize  Pool Origin Data%  Meta%  Move Log Cpy%Sync Convert
  home cs  -wi-ao---- 31.81g
  root cs  -wi-ao---- 65.15g
  swap cs  -wi-ao----  2.03g
  lnh1 lnh -wi-a-----  3.00g
[root@lnh ~]# mkfs.ext4 /dev/lnh/lnh1  //格式化逻辑卷(绝对路径)
mke2fs 1.45.6 (20-Mar-2020)   //也可以用 xfs_growfs格式化
Creating filesystem with 786432 4k blocks and 196608 inodes
Filesystem UUID: 00961f51-0f48-492d-aac0-1e2fb3de6922
Superblock backups stored on blocks:
	32768, 98304, 163840, 229376, 294912

Allocating group tables: done
Writing inode tables: done
Creating journal (16384 blocks): done
Writing superblocks and filesystem accounting information: done

[root@lnh ~]# mkdir /ma   //创建逻辑卷挂载点目录
[root@lnh ~]# blkid | grep lnh1     //过滤出逻辑卷的uuid
/dev/mapper/lnh-lnh1: UUID="00961f51-0f48-492d-aac0-1e2fb3de6922" BLOCK_SIZE="4096" TYPE="ext4"
[root@lnh ~]# vim /etc/fstab     //进行永久挂载
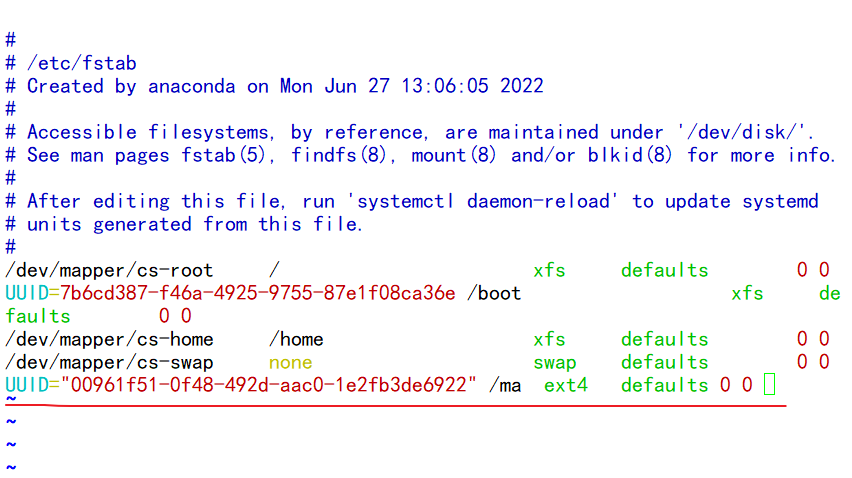
[root@lnh ~]# mount -a    //重新加载挂载
[root@lnh ~]# df -Th      //查看
Filesystem           Type      Size  Used Avail Use% Mounted on
devtmpfs             devtmpfs  956M     0  956M   0% /dev
tmpfs                tmpfs     975M     0  975M   0% /dev/shm
tmpfs                tmpfs     975M  8.8M  966M   1% /run
tmpfs                tmpfs     975M     0  975M   0% /sys/fs/cgroup
/dev/mapper/cs-root  xfs        66G  4.2G   62G   7% /
/dev/mapper/cs-home  xfs        32G  260M   32G   1% /home
/dev/sda1            xfs      1014M  178M  837M  18% /boot
tmpfs                tmpfs     195M     0  195M   0% /run/user/0
/dev/mapper/lnh-lnh1 ext4      2.9G  9.0M  2.8G   1% /ma
扩展逻辑卷
扩展逻辑卷:mkfs.ext4格式、还是xfs_growfs 格式都可以
[root@lnh ~]# lvextend -L 6G /dev/lnh/lnh1 //将原来的3G扩展到6G(指定大小)
  Size of logical volume lnh/lnh1 changed from 3.00 GiB (768 extents) to 6.00 GiB (1536 extents).
  Logical volume lnh/lnh1 successfully resized.
[root@lnh ~]# resize2fs /dev/lnh/lnh1   //格式化扩展(mkfs.ext4格式)
resize2fs 1.45.6 (20-Mar-2020)
Filesystem at /dev/lnh/lnh1 is mounted on /ma; on-line resizing required
old_desc_blocks = 1, new_desc_blocks = 1
The filesystem on /dev/lnh/lnh1 is now 1572864 (4k) blocks long.

[root@lnh ~]# df -Th   //查看
Filesystem           Type      Size  Used Avail Use% Mounted on
devtmpfs             devtmpfs  956M     0  956M   0% /dev
tmpfs                tmpfs     975M     0  975M   0% /dev/shm
tmpfs                tmpfs     975M  8.8M  966M   1% /run
tmpfs                tmpfs     975M     0  975M   0% /sys/fs/cgroup
/dev/mapper/cs-root  xfs        66G  4.2G   62G   7% /
/dev/mapper/cs-home  xfs        32G  260M   32G   1% /home
/dev/sda1            xfs      1014M  178M  837M  18% /boot
tmpfs                tmpfs     195M     0  195M   0% /run/user/0
/dev/mapper/lnh-lnh1 ext4      5.9G   12M  5.6G   1% /ma
//lvextend -L +6G /dev/lnh/lnh1在我这个lnh1逻辑卷3G的基础上再扩展6G
如果这个逻辑卷之前是xfs_growfs格式的那么要用xfs_growfs 格式扩展格式化
裁剪逻辑卷
[root@lnh ~]# umount /ma //取消挂载
[root@lnh ~]# e2fsck -f /dev/lnh/lnh1  //检查lnh1逻辑卷文件系统
e2fsck 1.45.6 (20-Mar-2020)
Pass 1: Checking inodes, blocks, and sizes
Pass 2: Checking directory structure
Pass 3: Checking directory connectivity
Pass 4: Checking reference counts
Pass 5: Checking group summary information
/dev/lnh/lnh1: 11/393216 files (0.0% non-contiguous), 47214/1572864 blocks
[root@lnh ~]# resize2fs /dev/lnh/lnh1 4G
resize2fs 1.45.6 (20-Mar-2020)
Resizing the filesystem on /dev/lnh/lnh1 to 1048576 (4k) blocks.
The filesystem on /dev/lnh/lnh1 is now 1048576 (4k) blocks long.
[root@lnh ~]# lvreduce -L 4G /dev/lnh/lnh1   //格式化裁剪到4G
  WARNING: Reducing active logical volume to 4.00 GiB.
  THIS MAY DESTROY YOUR DATA (filesystem etc.)
Do you really want to reduce lnh/lnh1? [y/n]: y
  Size of logical volume lnh/lnh1 changed from 6.00 GiB (1536 extents) to 4.00 GiB (1024 extents).
  Logical volume lnh/lnh1 successfully resized.
[root@lnh ~]# e2fsck -f /dev/lnh/lnh1 //检查lnh1逻辑卷文件系统
e2fsck 1.45.6 (20-Mar-2020)
Pass 1: Checking inodes, blocks, and sizes
Pass 2: Checking directory structure
Pass 3: Checking directory connectivity
Pass 4: Checking reference counts
Pass 5: Checking group summary information
/dev/lnh/lnh1: 11/262144 files (0.0% non-contiguous), 38990/1048576 blocks
[root@lnh ~]# mount -a   //读取挂载
[root@lnh ~]# df -Th   //查看
Filesystem           Type      Size  Used Avail Use% Mounted on
devtmpfs             devtmpfs  956M     0  956M   0% /dev
tmpfs                tmpfs     975M     0  975M   0% /dev/shm
tmpfs                tmpfs     975M  8.8M  966M   1% /run
tmpfs                tmpfs     975M     0  975M   0% /sys/fs/cgroup
/dev/mapper/cs-root  xfs        66G  4.2G   62G   7% /
/dev/mapper/cs-home  xfs        32G  260M   32G   1% /home
/dev/sda1            xfs      1014M  178M  837M  18% /boot
tmpfs                tmpfs     195M     0  195M   0% /run/user/0
/dev/mapper/lnh-lnh1 ext4      3.9G   24M  3.7G   1% /ma
删除卷
[root@lnh ~]# df -Th
Filesystem           Type      Size  Used Avail Use% Mounted on
devtmpfs             devtmpfs  956M     0  956M   0% /dev
tmpfs                tmpfs     975M     0  975M   0% /dev/shm
tmpfs                tmpfs     975M  8.8M  966M   1% /run
tmpfs                tmpfs     975M     0  975M   0% /sys/fs/cgroup
/dev/mapper/cs-root  xfs        66G  4.2G   62G   7% /
/dev/mapper/cs-home  xfs        32G  260M   32G   1% /home
/dev/sda1            xfs      1014M  178M  837M  18% /boot
tmpfs                tmpfs     195M     0  195M   0% /run/user/0
/dev/mapper/lnh-lnh1 ext4      3.9G   24M  3.7G   1% /ma
[root@lnh ~]# umount /ma  //取消挂载
[root@lnh ~]# lvs         //查看逻辑卷
  LV   VG  Attr       LSize  Pool Origin Data%  Meta%  Move Log Cpy%Sync Convert
  home cs  -wi-ao---- 31.81g
  root cs  -wi-ao---- 65.15g
  swap cs  -wi-ao----  2.03g
  lnh1 lnh -wi-ao----  4.00g
[root@lnh ~]# lvremove /dev/lnh/lnh1    //删除逻辑卷
Do you really want to remove active logical volume lnh/lnh1? [y/n]: y
  Logical volume "lnh1" successfully removed
[root@lnh ~]# lvs
  LV   VG Attr       LSize  Pool Origin Data%  Meta%  Move Log Cpy%Sync Convert
  home cs -wi-ao---- 31.81g
  root cs -wi-ao---- 65.15g
  swap cs -wi-ao----  2.03g
[root@lnh ~]# vgs
  VG  #PV #LV #SN Attr   VSize   VFree
  cs    1   3   0 wz--n- <99.00g    0
  lnh   2   1   0 wz--n-   9.99g 5.99g
[root@lnh ~]# vgremove lnh      //删除卷组
  Volume group "lnh" successfully removed
[root@lnh ~]# vgs
  VG #PV #LV #SN Attr   VSize   VFree
  cs   1   3   0 wz--n- <99.00g    0
[root@lnh ~]# pvs
  PV         VG Fmt  Attr PSize   PFree
  /dev/sda2  cs lvm2 a--  <99.00g    0
  /dev/sdd      lvm2 ---    5.00g 5.00g
  /dev/sde      lvm2 ---    5.00g 5.00g
[root@lnh ~]# pvremove /dev/sd{d,e}    //删除物理卷
  Labels on physical volume "/dev/sdd" successfully wiped.
  Labels on physical volume "/dev/sde" successfully wiped.
[root@lnh ~]# pvs
  PV         VG Fmt  Attr PSize   PFree
  /dev/sda2  cs lvm2 a--  <99.00g    0
[root@lnh ~]# pvcreate /dev/sd{c,d,e}
WARNING: sun signature detected on /dev/sdc at offset 508. Wipe it? [y/n]: y
  Wiping sun signature on /dev/sdc.
  Physical volume "/dev/sdc" successfully created.
  Physical volume "/dev/sdd" successfully created.
  Physical volume "/dev/sde" successfully created.
[root@lnh ~]# pvs
  PV         VG Fmt  Attr PSize   PFree
  /dev/sda2  cs lvm2 a--  <99.00g    0
  /dev/sdc      lvm2 ---    5.00g 5.00g
  /dev/sdd      lvm2 ---    5.00g 5.00g
  /dev/sde      lvm2 ---    5.00g 5.00g
[root@lnh ~]# vgcreate lnh /dev/sd{c,d,e}
  Volume group "lnh" successfully created
[root@lnh ~]# vgs
  VG  #PV #LV #SN Attr   VSize   VFree
  cs    1   3   0 wz--n- <99.00g      0
  lnh   3   0   0 wz--n- <14.99g <14.99g
[root@lnh ~]# vgreduce lnh /dev/sdc
  Removed "/dev/sdc" from volume group "lnh"
[root@lnh ~]# vgs
  VG  #PV #LV #SN Attr   VSize   VFree
  cs    1   3   0 wz--n- <99.00g    0
  lnh   2   0   0 wz--n-   9.99g 9.99g
[root@lnh ~]# vgreduce lnh /dev/sdd
  Removed "/dev/sdd" from volume group "lnh"
[root@lnh ~]# vgs
  VG  #PV #LV #SN Attr   VSize   VFree
  cs    1   3   0 wz--n- <99.00g     0
  lnh   1   0   0 wz--n-  <5.00g <5.00g
//从同一个卷组的中移除物理卷
同卷组进行数据迁移
[root@lnh ~]# vgcreate lnh /dev/sd{b,c}
  Volume group "lnh" successfully created
[root@lnh ~]# vgs
  VG  #PV #LV #SN Attr   VSize   VFree
  cs    1   3   0 wz--n- <99.00g    0
  lnh   2   0   0 wz--n-   9.99g 9.99g
[root@lnh ~]# pvs
  PV         VG  Fmt  Attr PSize   PFree
  /dev/sda2  cs  lvm2 a--  <99.00g     0
  /dev/sdb   lnh lvm2 a--   <5.00g <5.00g
  /dev/sdc   lnh lvm2 a--   <5.00g <5.00g
[root@lnh ~]# pvmove /dev/sdb
  /dev/sdb: Moved: 5.08%
  /dev/sdb: Moved: 100.00%
[root@lnh ~]# pvs
  PV         VG  Fmt  Attr PSize   PFree
  /dev/sda2  cs  lvm2 a--  <99.00g     0
  /dev/sdb   lnh lvm2 a--   <5.00g <5.00g
  /dev/sdc   lnh lvm2 a--   <5.00g <4.00g
//本来是sdb里面它的总大小是5G,内部资料占用了1G,然后数据转移后就变成sdc里面的内部质量占1G,总大小5G
linux计划任务管理
作业
- 在linux系统中备份脚本backup.sh需要再每周1-5的每天下午1点和晚上8点执行,下列哪个cron命令可以完成(d)
a. 00 13,20 * 1-5 * backup.sh
b. 0 13,20 1,5 * * backup.sh
c. * 13,20 * * 1-5 backup.sh
d. 00 13,20 * * 1-5 backup.sh
说明以上答案每一行是什么含义
a:每年1-5月的每天下午1点和晚上8点执行
b:每月的1号和5号每天下午1点和晚上8点执行
c:错误表示
d:每周星期一到星期五的每天下午1点和晚上8点执行
- 新建/scripts/httpd.sh文件,并让/scripts/httpd.sh脚本在每天的00:10分执行
[root@lnh ~]# mkdir /scripts
[root@lnh ~]# touch /scripts/httpd.sh
[root@lnh ~]# crontab -e
crontab: installing new crontab
[root@lnh ~]# crontab -l
10 00 * * * /usr/bin/sh /scripts/httpd.sh
- 新建/backup目录,每周一下午5:50将/backup目录下的所有文件打包成 backup.tar.gz
[root@lnh ~]# mkdir /backup
[root@lnh ~]# which tar
/usr/bin/tar
[root@lnh ~]# crontab -e
crontab: installing new crontab
[root@lnh ~]# crontab -l
##压缩
50 17 * * * /usr/bin/tar -zcf backup.tar.gz /backup
- 写一个定时任务,每天0点5分把/var/log/nginx下7天前的文件转移到/backup/2018_xx_xx的目录中
[root@lnh ~]# crontab -e
crontab: installing new crontab
[root@lnh ~]# crontab -l
##转移文件
5 0 * * * /usr/bin/find /var/log/nginx -mtime +7 | xargs /usr/bin/mv {} /backup/$(date '+%Y_%m_%d')
- 系统脚本/scripts/which.sh,如何定时每隔7分钟执行一次?
[root@lnh ~]# crontab -e
crontab: installing new crontab
[root@lnh ~]# crontab -l
*/7 * * * *  /usr/bin/scripts  /scripts/which.sh
- 如何不小心删除了/var/spool/cron/root文件,该如何恢复。
经查,CentOS 系统的 crontab 任务的日志,打印在 /var/log/cron 之中。考虑过滤日志:
cat /var/log/cron* | grep -i "某个用户" | grep "CMD" | awk -F ‘(‘ ‘{print $3}‘ | awk -F ‘)‘ ‘{print $1}‘ | sort -u > crontab_tmp
说明??:

grep -i "某个用户" :是为了过滤某个用户的信息。比如你在test这个账户下误操作“crontab -r”删除当前用户的crontab文件,那么你可以使用 grep -i "test" 过滤test账户使用的
命令。
后续根据提取出来的命令再去 /var/log/cron文件中确认一下时间间隔,按照指定的方式恢复至/var/spool/cron/。
标签:管理,dev,cs,lnh,lnh1,LVM,tmpfs,root 来源: https://www.cnblogs.com/tushanbu/p/16492058.html
本站声明: 1. iCode9 技术分享网(下文简称本站)提供的所有内容,仅供技术学习、探讨和分享; 2. 关于本站的所有留言、评论、转载及引用,纯属内容发起人的个人观点,与本站观点和立场无关; 3. 关于本站的所有言论和文字,纯属内容发起人的个人观点,与本站观点和立场无关; 4. 本站文章均是网友提供,不完全保证技术分享内容的完整性、准确性、时效性、风险性和版权归属;如您发现该文章侵犯了您的权益,可联系我们第一时间进行删除; 5. 本站为非盈利性的个人网站,所有内容不会用来进行牟利,也不会利用任何形式的广告来间接获益,纯粹是为了广大技术爱好者提供技术内容和技术思想的分享性交流网站。