标签:集成 HarmonyOS AppLinking maven huawei 签名 com 链接
App Linking是一种支持Android、iOS、HarmonyOS、Web等多种平台的跳转链接,无论用户是否已经安装您的应用,App Linking都能够按照您指定的方式进行跳转。用户在Android、iOS或HarmonyOS设备上点击App Linking后,即可跳转到链接指定的内容。用户在PC端浏览器中打开相同的链接地址,也可以跳转到网站上的同等内容。
集成内容
通过HarmonyOS sdk插件集成AppLinking服务,在AGC控制台开启服务,添加一个链接前缀,同时端侧集成SDK调用生成长链接和短链接,分享链接至浏览器,展示分享的内容。
集成准备
1、安装DevEco Studio开发工具,并熟悉HarmonyOS应用的开发流程。
2、AGC创建工程并开通服务
a)在AGC创建HarmonyOS应用并开通验证服务。
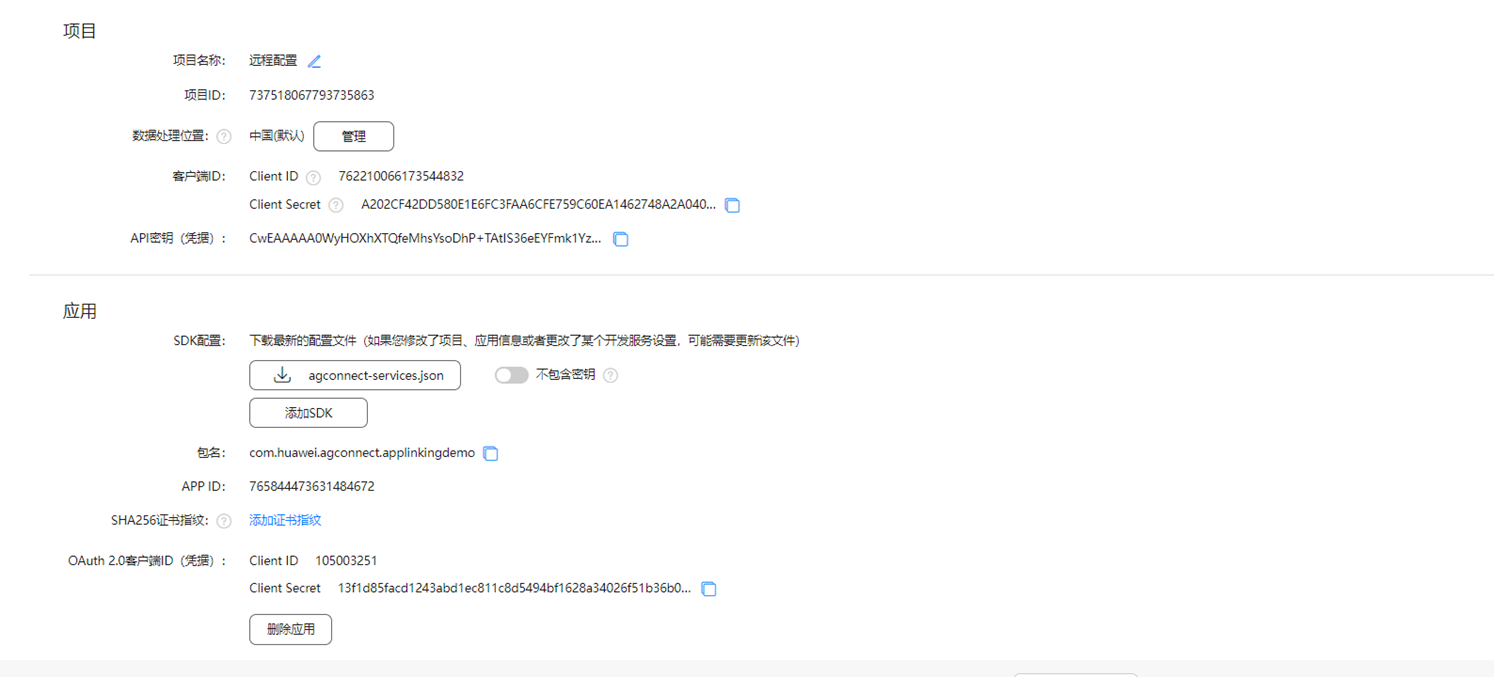

b)添加链接前缀

3、DevEco Studio中创建HarmonyOS工程
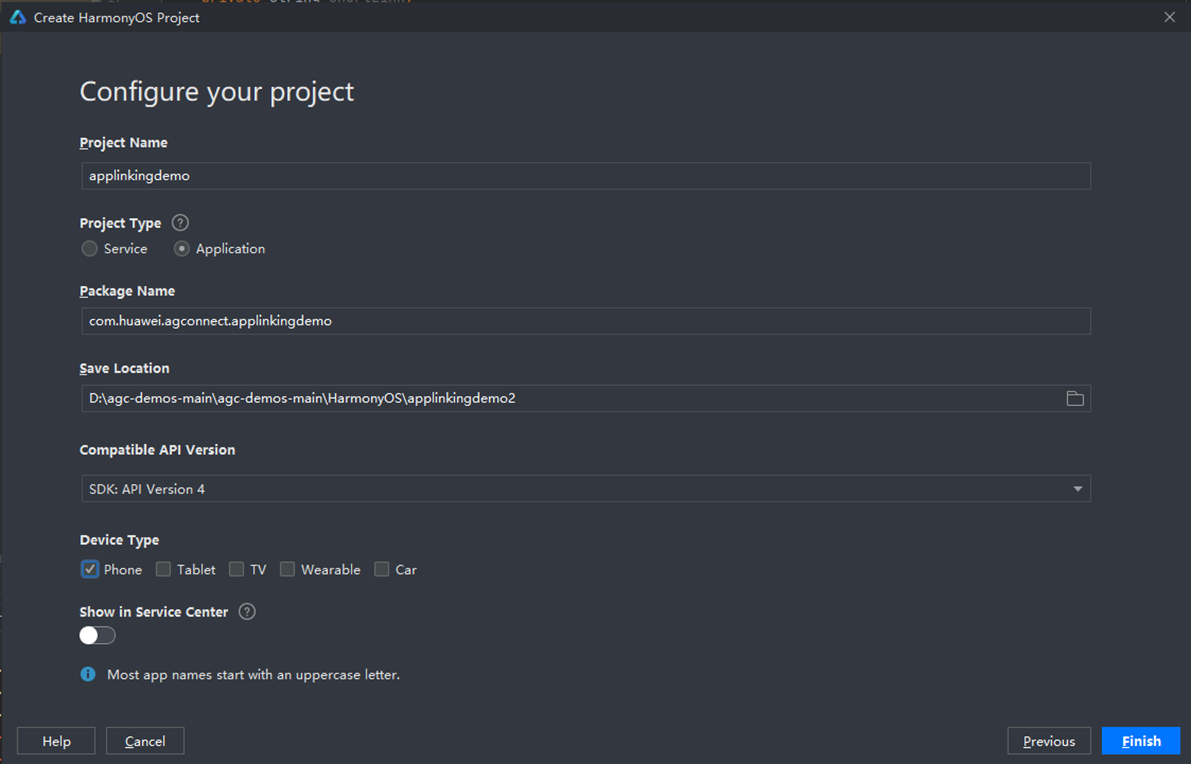
a)打开IDE工具,选择File-New-New project,选择Java语言编译模板后,点击Next进入创建工程配置界面。
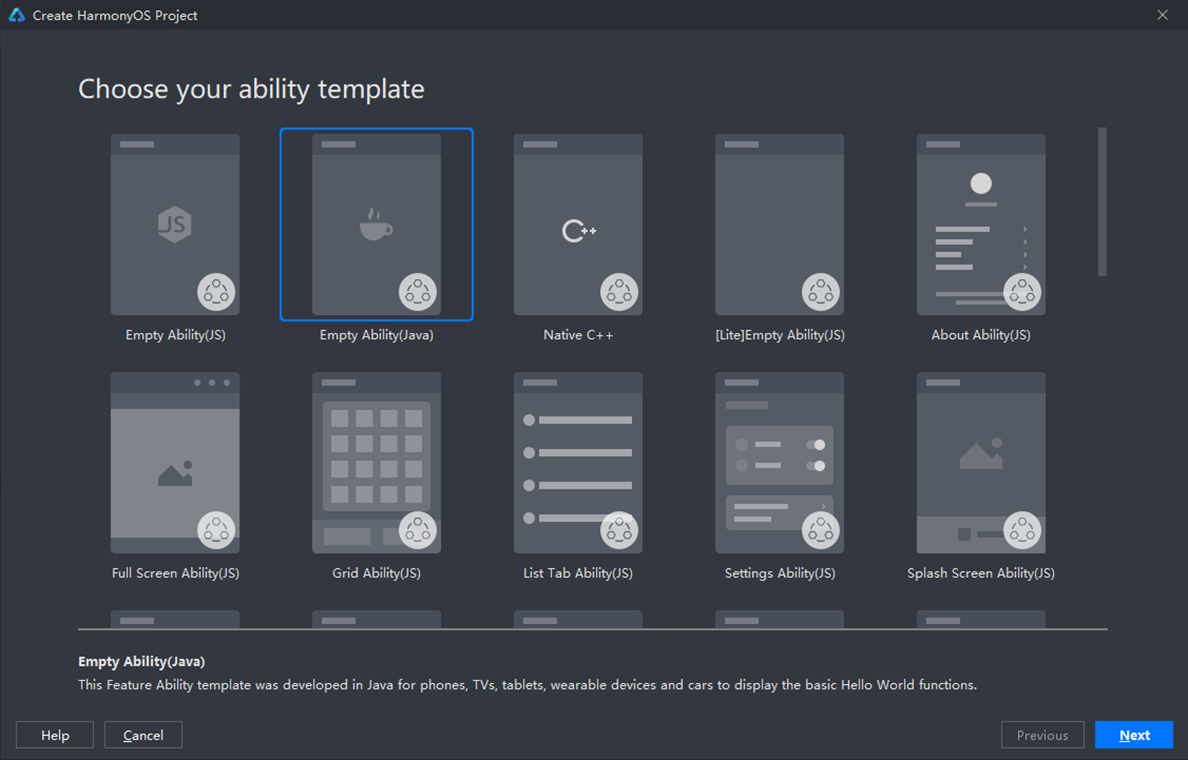
注意选择应用(Application),包名和AGC创建的应用包名相同。
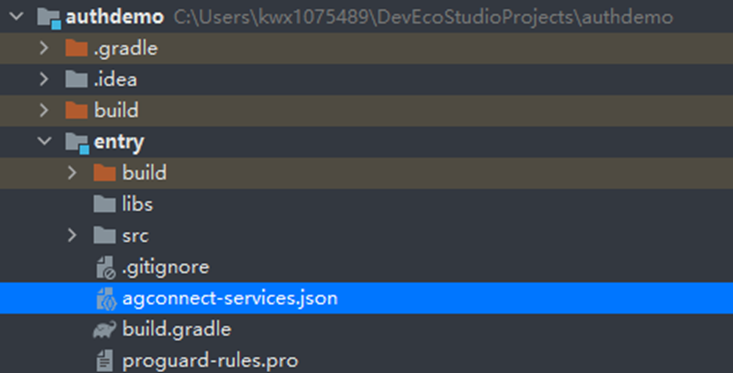
b)将agconnect-services.json文件拷贝到项目的entry模块的目录下
c)配置Maven仓地址和AGC插件地址。
打开DevEco Studio项目级build.gradle文件。
在allprojects ->repositories里面配置maven仓地址。
在buildscript->repositories中配置maven仓地址。
在buildscript->dependencies中配置AppGallery Connect插件地址。
测试环境需要配置内部私仓地址,正式环境需要配置外部正式仓。
buildscript {
    repositories {
        maven {
            url 'https://repo.huaweicloud.com/repository/maven/'
        }
        maven {
            url 'https://developer.huawei.com/repo/'
        }
        maven { url 'http://language.cloudartifact.dgg.dragon.tools.huawei.com/artifactory/product_maven' }
        maven { url 'http://szg1.artifactory.inhuawei.com/artifactory/sz-maven-public/' }
        jcenter()
    }
    dependencies {
        classpath 'com.huawei.ohos:hap:2.4.4.2'
        classpath 'com.huawei.ohos:decctest:1.2.4.0'
        classpath 'com.huawei.agconnect:agcp-harmony:1.2.0.200'
    }
}

allprojects {
    repositories {
        maven {
            url 'https://repo.huaweicloud.com/repository/maven/'
        }
        maven {
            url 'https://developer.huawei.com/repo/'
        }
        maven { url 'http://language.cloudartifact.dgg.dragon.tools.huawei.com/artifactory/product_maven' }
        maven { url 'http://szg1.artifactory.inhuawei.com/artifactory/sz-maven-public/' }
        jcenter()
    }
}
d)添加编译依赖和集成SDK。
打开HarmonyOS项目应用级(entry)的build.gradle文件,添加插件地址。
apply plugin: 'com.huawei.ohos.hap'
apply plugin: 'com.huawei.ohos.decctest'
apply plugin: 'com.huawei.agconnect'
在“dependencies”中添加添加agconnect-core的编译依赖和AppLinking SDK。
dependencies {
    implementation fileTree(dir: 'libs', include: ['*.jar', '*.har'])
    implementation "com.huawei.agconnect:agconnect-applinking-harmony: 1.2.1.300"
    testImplementation 'junit:junit:4.13'
    ohosTestImplementation 'com.huawei.ohos.testkit:runner:1.0.0.100'
}
e)entry (hap)模块添加配置信息
enrty模块的config.json文件的module/abilities中,加入如下配置,注意包名的替换。
{
  "permissions": [
    "com.huawei.agconnect.core.DataAbilityShellProvider.PROVIDER"
  ],
  "name": "com.huawei.agconnect.core.provider.AGConnectInitializeAbility",
  "type": "data",
  "uri": "dataability://com.huawei.agconnect.applinkingdemo.AGConnectInitializeAbility"
}
f)同步工程配置。

4、配置签名信息。
Harmony应用安装到真机进行测试,需要配置签名信息,有手动签名和自动签名两种方式,具体可以参见:配置签名信息。建议优先使用自动签名方式,如自动签名失败,可以选择手动签名方式。这里使用自动签名方式:
a)连接真机设备,确保DevEco Studio与真机设备已连接,真机连接成功后如下图所示

b)进入File > Project Structure > Project > Signing Configs界面,点击“Sign In”按钮进行登录,选择Debug,勾选Automatically generate signing,点击try again即可自动进行签名。自动生成签名所需的密钥(.p12)、数字证书(.cer)和Profile文件(.p7b)会存放到用户user目录下的.ohos\config目录下。
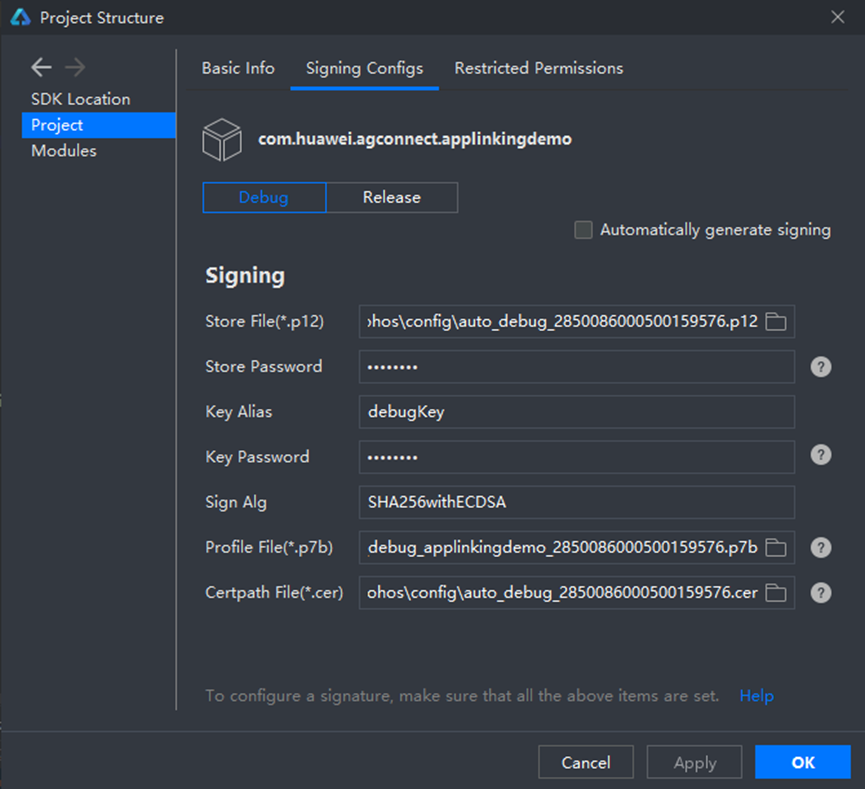
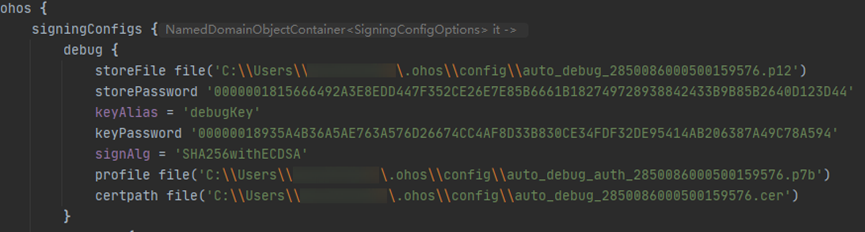
设置完签名信息后,点击OK进行保存,然后可以在工程下的build.gradle中查看签名的配置信息。
登录AGC,进入“用户与访问”-“证书管理”,点击新增证书,上传前面生成的.csr文件,类型选择调试证书。
完成签名配置后即可点击安装应用到调试设备。
功能实现
布局设计
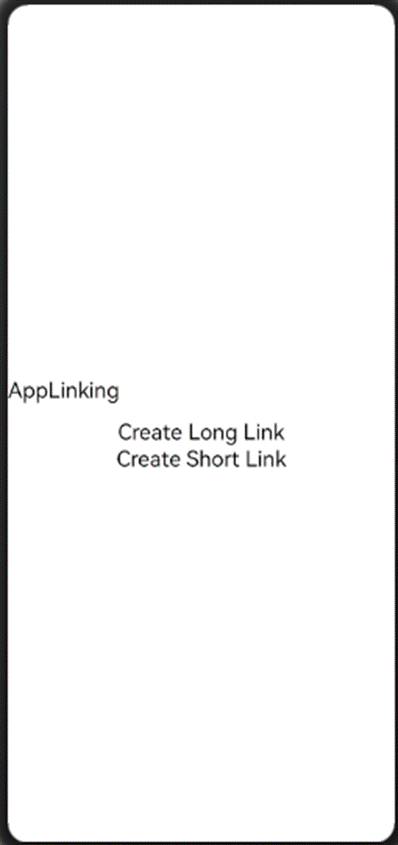
参考如上设置布局,一个Text,两个Button,按钮“Creat Long Link”用来创建长链接,按钮“Creat Short Link”用来创建短链接,布局代码如下:
<?xml version="1.0" encoding="utf-8"?>
<DirectionalLayout
    xmlns:ohos="http://schemas.huawei.com/res/ohos"
    ohos:height="match_parent"
    ohos:width="match_parent"
    ohos:alignment="center"
    ohos:orientation="vertical">

    <Text
        ohos:id="$+id:text_linking"
        ohos:height="match_content"
        ohos:width="match_parent"
      ohos:background_element="$graphic:background_ability_main"
        ohos:layout_alignment="horizontal_center"
        ohos:text="$string:mainability_linking"
        ohos:text_size="20vp"
        ohos:multiple_lines="true"
        />

    <Button
        ohos:id="$+id:button_createlong"
        ohos:height="match_content"
        ohos:width="match_content"
        ohos:text="$string:mainability_CreateLongLink"
        ohos:text_size="20vp"
        ohos:top_margin="40px"
        />

    <Button
        ohos:id="$+id:button_createshort"
        ohos:height="match_content"
        ohos:width="match_content"
        ohos:text="$string:mainability_CreateShortLink"
        ohos:text_size="20vp"
        ohos:focus_border_enable="true"
        />
</DirectionalLayout>
创建链接
1、在onStart方法定义相关界面元素:
text = (Text) findComponentById(ResourceTable.Id_text_linking);
Button createShort = (Button) findComponentById(ResourceTable.Id_button_createshort);
createShort.setClickedListener(component -> {
    createShortLink();
});
Button createLong = (Button) findComponentById(ResourceTable.Id_button_createlong);
createLong.setClickedListener(component -> {
    createLongLink();
});
2、初始化App Linking对象实例:
AGConnectAppLinking.getInstance().getAppLinking(getAbility()).addOnSuccessListener(resolvedLinkData -> {
    HiLog.info(LABEL, resolvedLinkData.getDeepLink());
}).addOnFailureListener(e -> {
    HiLog.error(LABEL, e.toString());
});
3、创建App Linking:
AppLinking.Builder builder = AppLinking.newBuilder()
            .setUriPrefix(DOMAIN_URI_PREFIX)
            .setDeepLink("https://www.example.com")
            .setHarmonyLinkInfo(AppLinking.HarmonyLinkInfo.newBuilder()
                    .setHarmonyDeepLink("agckit://example.com?appId=C5373&channelId=123412")
                    .build())
            .setCampaignInfo(AppLinking.CampaignInfo.newBuilder()
                    .setName("xinnian")
                    .setSource("huawei")
                    .setMedium("pic").build())
            .setIsShowPreview(true)
            .setPreviewType(AppLinking.LinkingPreviewType.AppInfo);
    builder.buildShortAppLinking().addOnSuccessListener(shortAppLinking -> {
        text.setText(shortAppLinking.getShortUrl());
    }).addOnFailureListener(e -> {
        HiLog.error(LABEL, e.toString());
    });
接收链接
接收AppLinking:
1、在Ability里面的skills添加对应的内容
"skills": [
  {
    "entities": [
      "entity.system.home"
    ],
    "actions": [
      "action.system.home"
    ]
  },
  {
    "actions": [
      "android.intent.action.VIEW"
    ],
    "entities": [
      "entity.system.default",
      "entity.system.browsable"
    ],
    "uris": [
      {
        "scheme": "agckit",
        "host": "example.com"
      }
    ]
  }
]
2、配置接收的代码:
AGConnectAppLinking.getInstance().getAppLinking(this).addOnSuccessListener(resolvedLinkData -> {
    Uri deepLink = null;
    if (resolvedLinkData!= null) {
        deepLink = resolvedLinkData.getDeepLink();
        String LinkInfo = deepLink.toString();
        HiLog.info(hiLogLabel,"getAppLinking success: " + LinkInfo);
    }
}
功能测试
完成上述配置以后,即可点击运行进行测试。复制链接至浏览器可以正确拉起HarmonyOS应用。

欲了解更多更全技术文章,欢迎访问https://developer.huawei.com/consumer/cn/forum/?ha_source=zzh
标签:集成,HarmonyOS,AppLinking,maven,huawei,签名,com,链接 来源: https://www.cnblogs.com/developer-huawei/p/16456948.html
本站声明: 1. iCode9 技术分享网(下文简称本站)提供的所有内容,仅供技术学习、探讨和分享; 2. 关于本站的所有留言、评论、转载及引用,纯属内容发起人的个人观点,与本站观点和立场无关; 3. 关于本站的所有言论和文字,纯属内容发起人的个人观点,与本站观点和立场无关; 4. 本站文章均是网友提供,不完全保证技术分享内容的完整性、准确性、时效性、风险性和版权归属;如您发现该文章侵犯了您的权益,可联系我们第一时间进行删除; 5. 本站为非盈利性的个人网站,所有内容不会用来进行牟利,也不会利用任何形式的广告来间接获益,纯粹是为了广大技术爱好者提供技术内容和技术思想的分享性交流网站。