标签:PowerApps Manage form SharePoint integration management table document
Microsoft Dataverse supports integration with SharePoint Online that enables you to use the document management capabilities of SharePoint from within Dataverse. Power Apps portals now supports uploading and displaying documents to and from SharePoint directly on a basic form or advanced form in a portal. This allows portal users to view, download, add, and delete documents from a portal. Portal users can also create subfolders to organize their documents.
Note
- Document management works only with SharePoint Online.
- Document management is supported with server-based integration.
To work with the document management capabilities of SharePoint from within Dataverse, you must:
-
Enable document management functionality for your environment
-
Set up SharePoint integration from Power Apps portals admin center
-
Create appropriate table permission and assign it to the appropriate web role
Step 1: Enable document management functionality in model-driven apps
You must enable the document management functionality in model-driven apps by using server-based SharePoint integration. Server-based SharePoint integration allows model-driven apps and SharePoint Online to perform a server-to-server connection. The default SharePoint site record is used by the portal. For information on how to enable document management functionality in model-driven apps, see Set up model-driven apps to use SharePoint Online.
Step 2: Set up SharePoint integration from Power Apps portals admin center
To use the document management capabilities of SharePoint, you must enable SharePoint integration from the Power Apps portals admin center.
Note
You must be a global administrator to perform this action.
-
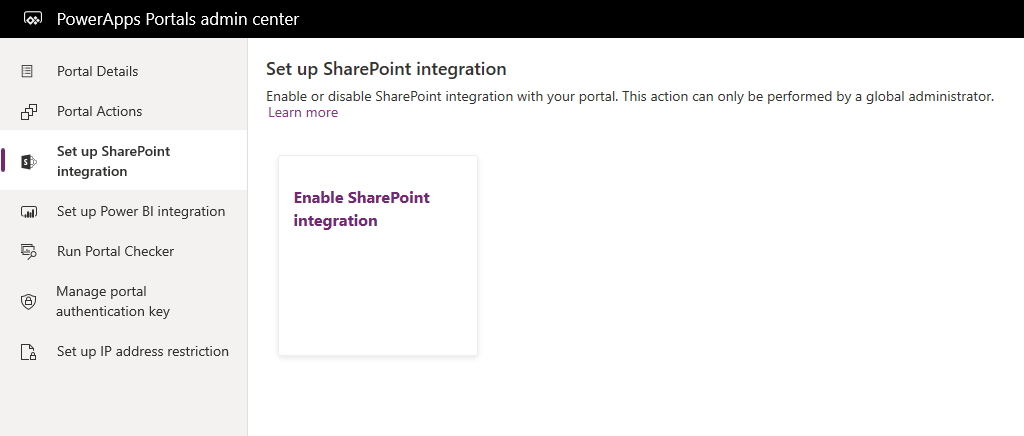
Go to Set up SharePoint integration > Enable SharePoint integration.
-
Select Enable in the confirmation window. This will enable the portal to communicate with SharePoint. While the SharePoint integration is being enabled, the portal restarts and will be unavailable for a few minutes. A message appears when SharePoint integration is enabled.
When SharePoint integration is enabled, the following action becomes available:
-
Disable SharePoint integration: Allows you to disable the SharePoint integration with your portal. While the SharePoint integration is being disabled, the portal restarts and will be unavailable for a few minutes. A message appears when SharePoint integration is disabled.
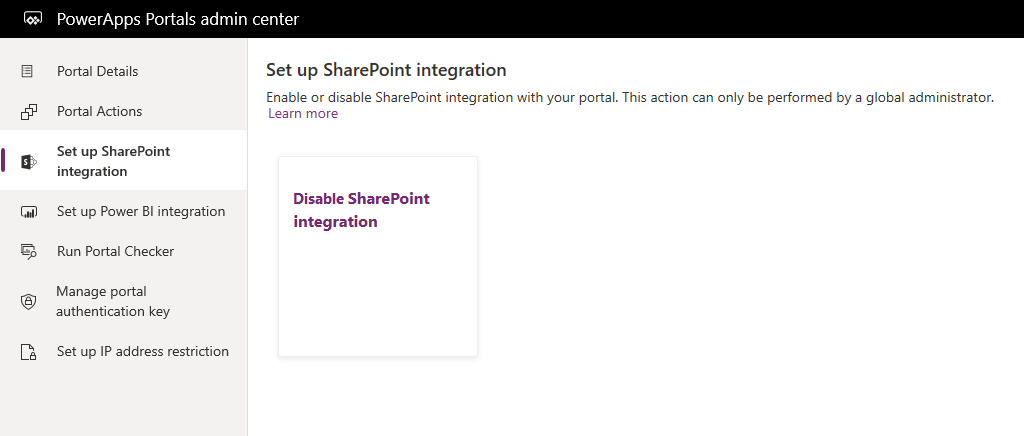
Enabling or disabling the SharePoint integration will update the Azure Active Directory (Azure AD) application for the portal and add or remove the required SharePoint permissions, respectively. You'll also be redirected to provide your consent for the changes to be made in the Azure AD application.
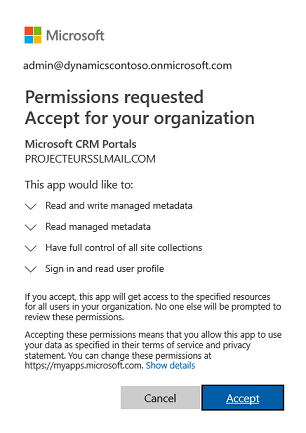
If you don't provide your consent:
-
Enabling or disabling the SharePoint integration won't be complete and an error message will display.
-
Your out-of-the-box Azure AD login on the portal won't work.
Step 3: Enable document management for tables
You must enable document management for tables to store documents related to table records in SharePoint. For information on how to enable document management for tables, see Enable SharePoint document management for specific tables.
Step 4: Configure the appropriate form to display documents
Power Apps customization
Identify the form where you want to use document management capabilities. You must edit the form by using model-driven app form editor and add a subgrid to it. The subgrid adds a section to the form, which allows you to work with documents from within a portal. You must set the following properties in the subgrid for this feature to work:
-
Under Data Source, select Document Locations from the Table list.
-
Under Data Source, select Active Document Locations from the Default View list.
You can specify name and label as per your requirement. Save and publish the form once the subgrid is added and configured.
Note
Document management must be enabled for the table for which you edit the form. More information: Enable document management for tables
Power Apps portals configuration
Apart from the standard configuration required for basic form or advanced form, you must set the following properties to enable document management:
-
Table Name and Form Name: Enter the table and form names customized in the previous step, respectively.
-
Select the Enable Table Permission check box on the form to allow a user to read the documents.
-
Set the Mode to Edit to allow document uploads.
Note
Document uploading requires the parent table record to exist. If you set the Mode to Insert, the document upload will not work because the parent table record is not created until the form is submitted.
Step 5: Create appropriate table permission and assign it to the appropriate web role
Two table permission records are required to establish the necessary access to view and upload documents.
- Permissions on the table of the table or advanced form:
- Create an Table Permission record specifying the Table Name as the table of the basic form or advanced form configured previously.
- Select a Access Type and access type relationship that is appropriate to the behavior of the form that you want.
- Enable Read and Append To privileges to allow read access to documents and optionally enable Writeprivilege to allow document uploads. Ignore the Child Table Permissions section for now since it will be populated by the next step.
- Permissions on the Document Location with Parent access type referring to the previous permission record:
- Create an Table Permission record specifying the Table Name as Document Location table with Access Typeset to Parent.
- Select the Parent Table Permission to the table permission record created in previous step.
- Privileges
- The minimum privileges to allow read access to documents are Read, Create, and Append.
- Include Write privileges for document upload access.
- Include Delete to allow deletion of a document.
Note
A corresponding child table permission on the Document Location table needs to be created for each instance of the parent table permission record that exists on the table of the table or advanced form where documents need to be shown.
Configure file upload size
By default, the file size is set to 10 MB. However, you can configure the file size to a maximum of 50 MB by using the site setting SharePoint/MaxUploadSize.
Maximum file download size
We recommend limiting the size of the individual files available for download to 250 MB or less. If you use portals to download larger files from SharePoint, the operation may timeout after a couple of minutes.
Sample configuration to enable document management on the Case basic form
The below example demonstrates configuration using the Case table which needs the Dynamics 365 Customer Service application as a pre-requisite. Although this sample uses the Case table, it is just an illustration of the steps mentioned above and can be followed with any other custom table or any Dataverse table that supports managing documents in SharePoint.
-
Follow the instructions in Step 1 to ensure that server-based configuration is complete for your environment and SharePoint integration.
-
Follow the instructions in Step 2 to ensure that the portal has permissions to integrate with SharePoint.
-
Follow the instructions in Step 3 to ensure Document Management is enabled for the Case table.
-
Follow the instructions in Step 4 with the following configurations:
-
Model-driven apps customization
a. Go to Settings > Customization > Customize the System.
b. In the Default Solution, go to the Case table > Forms.
c. Open the Web – Edit Case in form editor.
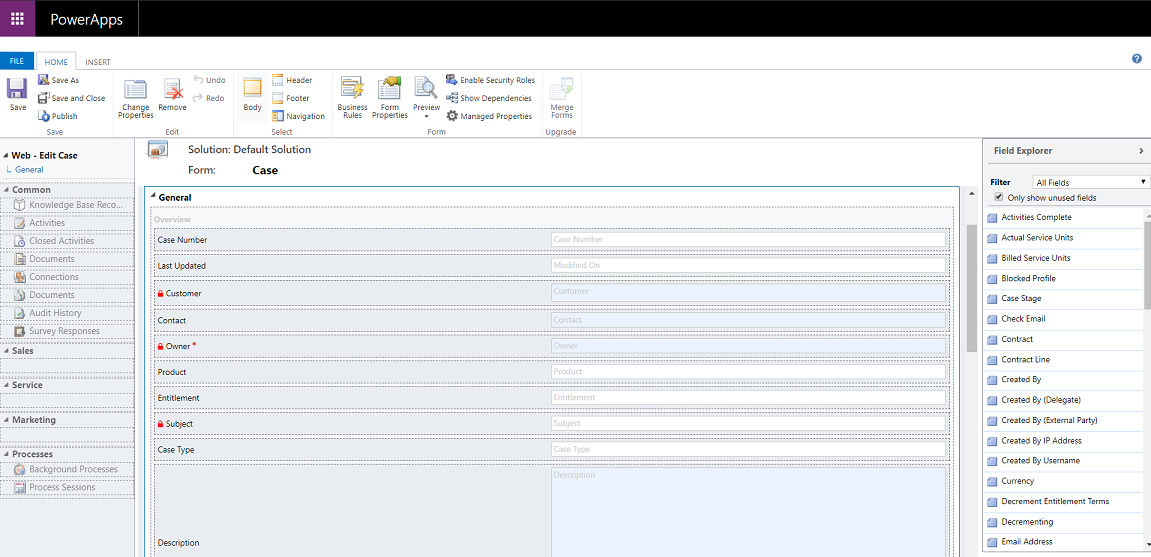
d. Select the Created On field on the form, and on the Insert tab, select Sub-Grid.
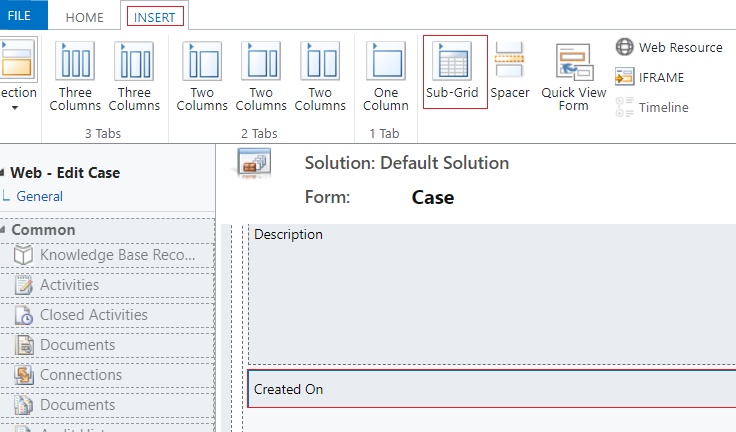
e. In the Set Properties dialog box, set the following properties, and select OK:
-
Name (This can be any name): CaseDocuments
-
Label (This can be any label name): Case Documents
-
Table: Document Locations
-
Default View: Active Document Locations
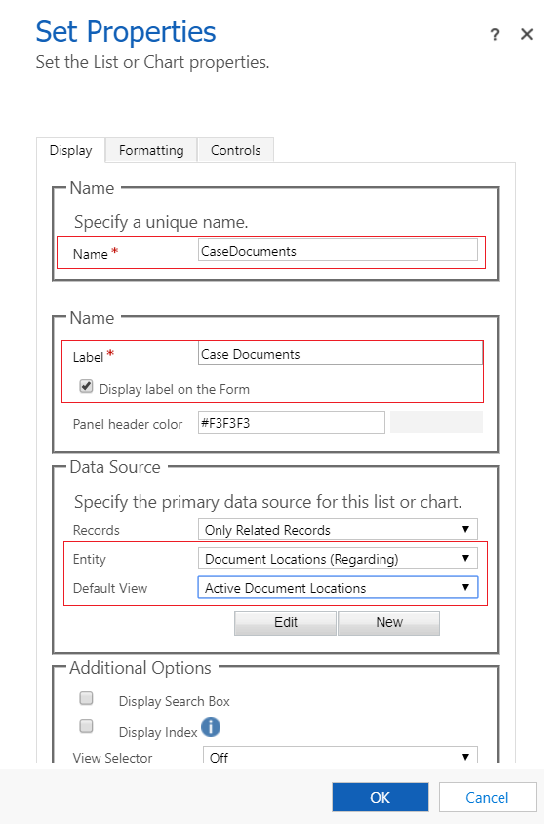
f. In the form editor, select Save and then select Publish.
-
-
Power Apps portals configuration
a. Open Portal Management app -> Basic Forms.
b. Find and open Customer Service - Edit Case basic form.
c. Review and ensure the following properties are set:
-
Table Name: Case (incident)
-
Form Name: Web – Edit Case
-
Mode: Edit
-
Table Permission: Enabled
d. If you’ve made any changes to the form, select Save.
-
-
-
Follow Step 5 to make sure table permissions are granted to the users.
-
Go to the Web Role record that is associated to the user. For this sample, we’ll assume that the user has an Administrator web role.
-
Ensure that an Table Permission record exists by the name of Customer Service - Cases where contact is customer.
Note
Ensure that your web role has this table permission added. If your user is already an Administrator, then the above table permission need not be explicitly assigned.
-
Create a new table permission, enter the following details, and select Save:
-
Name (This can be any name): Customer Service - Related Documents
-
Table Name: Document Location
-
Access Type: Parent
-
Parent Table Permission: Customer Service - Cases where contact is customer
-
Parent Relationship: incident_SharePointDocumentLocations
-
Privileges: Read, Create, Append, Write, Delete
-
Sign in to portal to ensure document management is enabled for the Case table.
a. Go to the Support page.
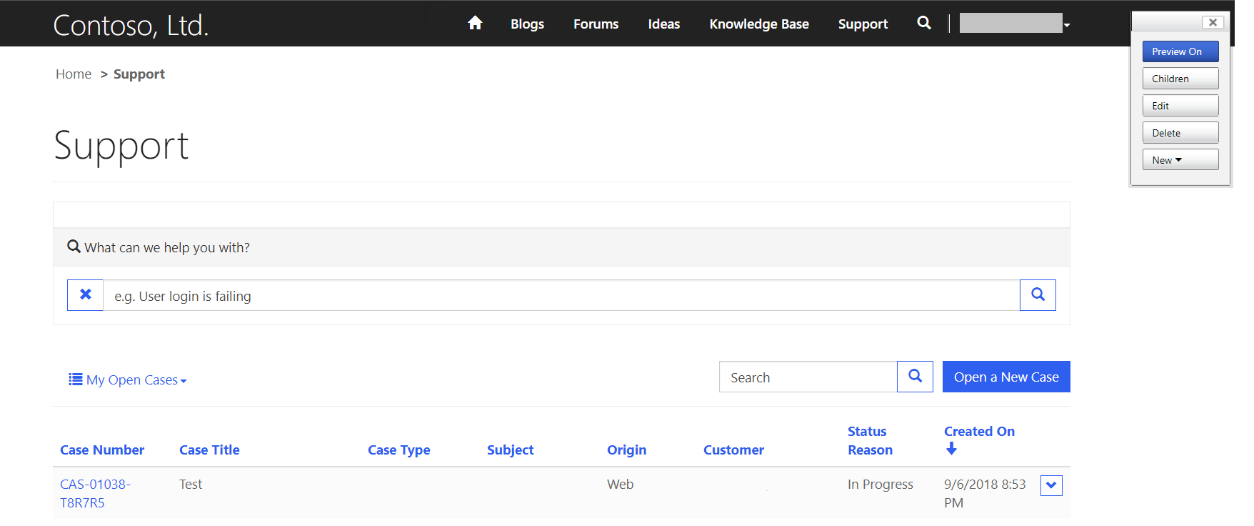
b. Select an existing Case record from the list. Go to the Case Documents section on the page and see the document list added.
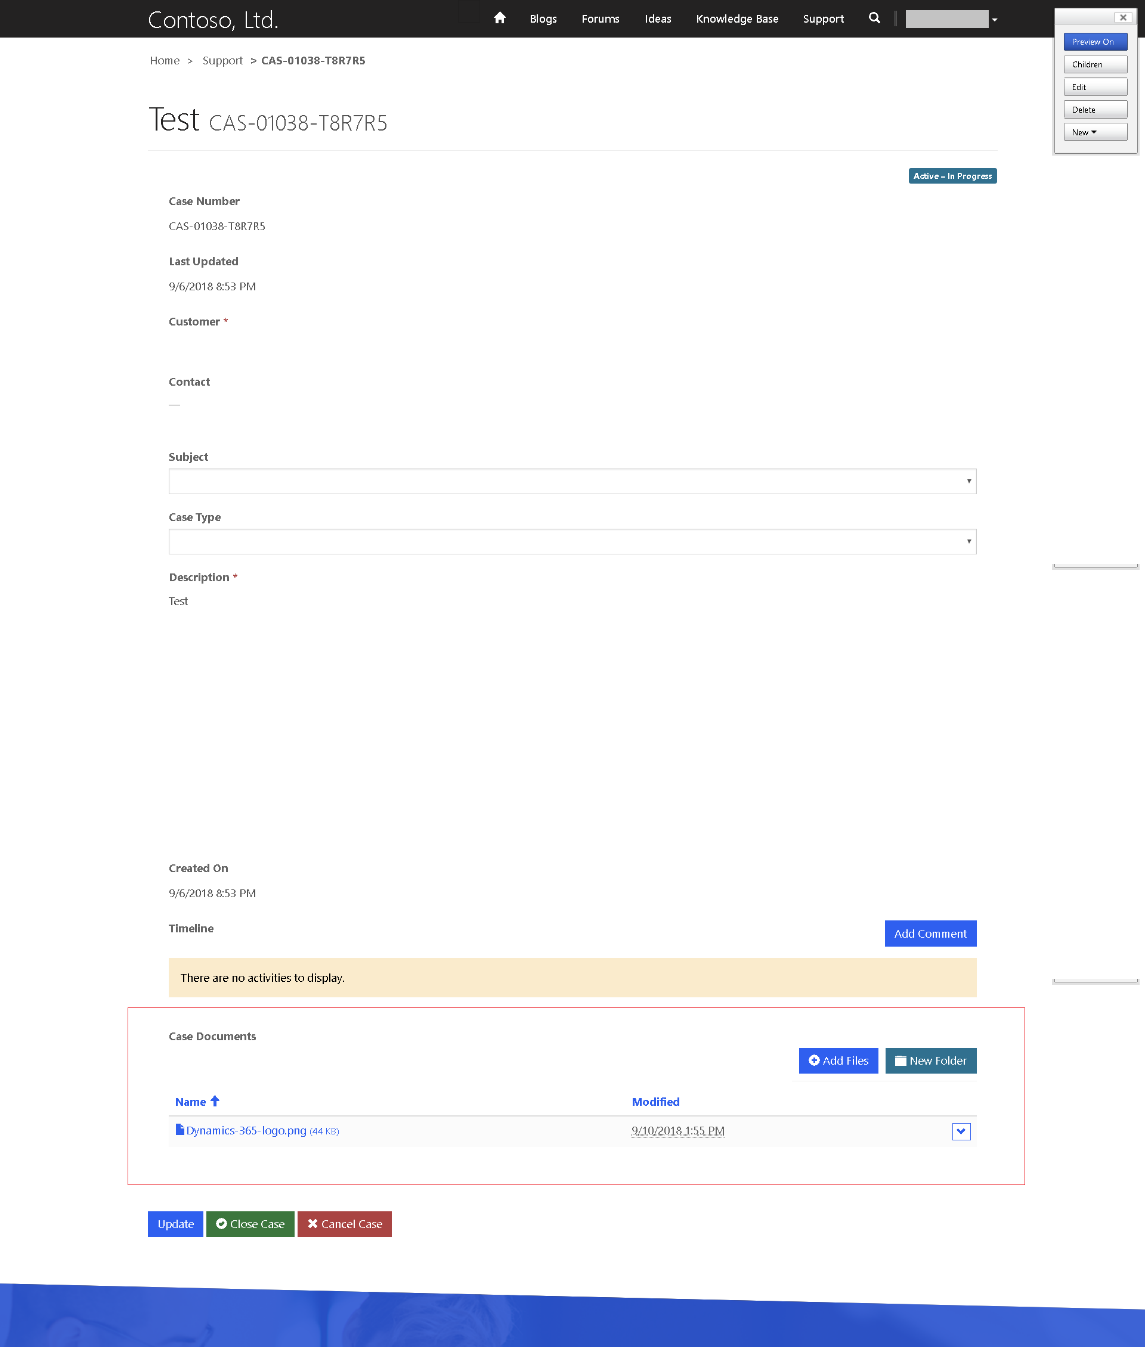
-
标签:PowerApps,Manage,form,SharePoint,integration,management,table,document 来源: https://www.cnblogs.com/lingdanglfw/p/14989103.html
本站声明: 1. iCode9 技术分享网(下文简称本站)提供的所有内容,仅供技术学习、探讨和分享; 2. 关于本站的所有留言、评论、转载及引用,纯属内容发起人的个人观点,与本站观点和立场无关; 3. 关于本站的所有言论和文字,纯属内容发起人的个人观点,与本站观点和立场无关; 4. 本站文章均是网友提供,不完全保证技术分享内容的完整性、准确性、时效性、风险性和版权归属;如您发现该文章侵犯了您的权益,可联系我们第一时间进行删除; 5. 本站为非盈利性的个人网站,所有内容不会用来进行牟利,也不会利用任何形式的广告来间接获益,纯粹是为了广大技术爱好者提供技术内容和技术思想的分享性交流网站。
