标签:lang JRE Java how Fix How version run our
https://www.baeldung.com/java-lang-unsupportedclassversion
Get started with Spring 5 and Spring Boot 2, through the Learn Spring course:
> CHECK OUT THE COURSE
1. Introduction
In this short tutorial, we're going to learn what causes the Java runtime error java.lang.UnsupportedClassVersionError: Unsupported major.minor version and how to fix it.
Further reading:
Java – “Could Not Find or Load Main Class” Error
Explore the reasons for the error "Could not find or load main class" and learn how to avoid them. Read more →Java Compiler Error: “class, interface, or enum expected”
Learn about the "class, interface, or enum expected" Java compiler error and how to fix it Read more →Causes and Avoidance of java.lang.VerifyError
Learn about the cause of java.lang.VerifyError errors and multiple ways to avoid it Read more →2. A Look at the Error
Let's start by looking at an example error:
Exception in thread "main" java.lang.UnsupportedClassVersionError: com/baeldung/MajorMinorApp
  has been compiled by a more recent version of the Java Runtime (class file version 55.0),
  this version of the Java Runtime only recognizes class file versions up to 52.0
This error is telling us that our class was compiled at a higher version of Java than the version with which we tried to run it. More specifically, in this case we compiled our class with Java 11 and tried to run it with Java 8.
2.1. Java Version Numbers
For reference, let's take a quick look at the Java version numbers. This will come in handy in case we need to download the appropriate Java version.
The major and minor version numbers are stored in the class bytecode at bytes six and seven.
<iframe data-google-container-id="2" data-is-safeframe="true" data-load-complete="true" frameborder="0" height="90" id="google_ads_iframe_/15184186,7114245/baeldung_leaderboard_mid_1_0" marginheight="0" marginwidth="0" scrolling="no" src="https://49c23aecf4e50cad88bac951f043eba9.safeframe.googlesyndication.com/safeframe/1-0-38/html/container.html" title="3rd party ad content" width="728"></iframe>Let's see how the major version numbers map to Java versions:
- 45 = Java 1.1
- 46 = Java 1.2
- 47 = Java 1.3
- 48 = Java 1.4
- 49 = Java 5
- 50 = Java 6
- 51 = Java 7
- 52 = Java 8
- 53 = Java 9
- 54 = Java 10
- 55 = Java 11
- 56 = Java 12
- 57 = Java 13
3. Fix via the Command Line
Now let's discuss how we can resolve this error when running Java from the command line.
Depending on our situation, we have two ways we can resolve this error: compile our code for an earlier version of Java, or run our code on a newer Java version.
The final decision depends on our situation. If we need to use a third-party library that's already been compiled at a higher level, our best option is probably to run our application using a newer Java version. If we're packaging an application for distribution, it might be best to compile down to an older version.
3.1. JAVA_HOME Environment Variable
Let's start by checking how our JAVA_HOME variable is set. This will tell us which JDK is being used when we run javac from our command line:
<iframe data-google-container-id="3" data-load-complete="true" frameborder="0" height="1" id="google_ads_iframe_/15184186,7114245/baeldung_leaderboard_mid_2_0" marginheight="0" marginwidth="0" name="google_ads_iframe_/15184186,7114245/baeldung_leaderboard_mid_2_0" scrolling="no" title="3rd party ad content" width="1"></iframe>echo %JAVA_HOME%
C:\Apps\Java\jdk8-x64If we're ready to move entirely to a newer JDK, we can download the newer version and make sure our PATH and JAVA_HOME environment variables are set appropriately.
3.2. Running a New JRE
Returning to our example, let's look at how we can resolve the error by running it at a higher version of Java. Assuming we have Java 11 JRE in C:\Apps\jdk-11.0.2, we can run our code with the java command packaged with it:
C:\Apps\jdk-11.0.2\bin\java com.baeldung.MajorMinorApp
Hello World!
3.3. Compiling With an Older JDK
If we're writing an application that we want to be runnable down to a certain version of Java, we need to compile the code for that version.
We can do that in one of three ways: using an older JDK to compile our code; using the -bootclasspath, -source, and -target options of the javac command (JDK 8 and older); or using the –release option (JDK 9 and newer).
Let's start by using an older JDK, similar to how we used a newer JRE for running our code:
<iframe data-google-container-id="4" data-is-safeframe="true" data-load-complete="true" frameborder="0" height="280" id="google_ads_iframe_/15184186,7114245/baeldung_leaderboard_mid_3_0" marginheight="0" marginwidth="0" scrolling="no" src="https://49c23aecf4e50cad88bac951f043eba9.safeframe.googlesyndication.com/safeframe/1-0-38/html/container.html" title="3rd party ad content" width="970"></iframe>C:\Apps\Java\jdk1.8.0_31\bin\javac com/baeldung/MajorMinorApp.javaIt's possible to just use -source and -target, but it might still create class files that aren't compatible with an older Java.
To ensure compatibility, we can point -bootclasspath at the rt.jar of the targeted JRE:
javac -bootclasspath "C:\Apps\Java\jdk1.8.0_31\jre\lib\rt.jar" \
  -source 1.8 -target 1.8 com/baeldung/MajorMinorApp.java
The above applies mainly to JDK 8 and lower. In JDK 9, the –release parameter was added to replace -source and -target. The –release option supports targets 6, 7, 8, 9, 10, and 11.
Let's use –release to target Java 8:
javac --release 8 com/baeldung/MajorMinorApp.javaNow we can run our code on a Java 8 or higher JRE.
4. Eclipse IDE
Now that we understand the error and the general approach to correcting it, let's take what we've learned and see how we can apply it when working in the Eclipse IDE.
4.1. Changing the JRE
Assuming we already have Eclipse configured with different versions of Java, let's change our project's JRE.
Let's go to our Project properties, then Java Build Path, and then the Libraries tab. Once there, we'll select the JRE and click Edit:
<iframe data-google-container-id="5" data-is-safeframe="true" data-load-complete="true" frameborder="0" height="250" id="google_ads_iframe_/15184186,7114245/baeldung_incontent_1_0" marginheight="0" marginwidth="0" scrolling="no" src="https://49c23aecf4e50cad88bac951f043eba9.safeframe.googlesyndication.com/safeframe/1-0-38/html/container.html" title="3rd party ad content" width="300"></iframe>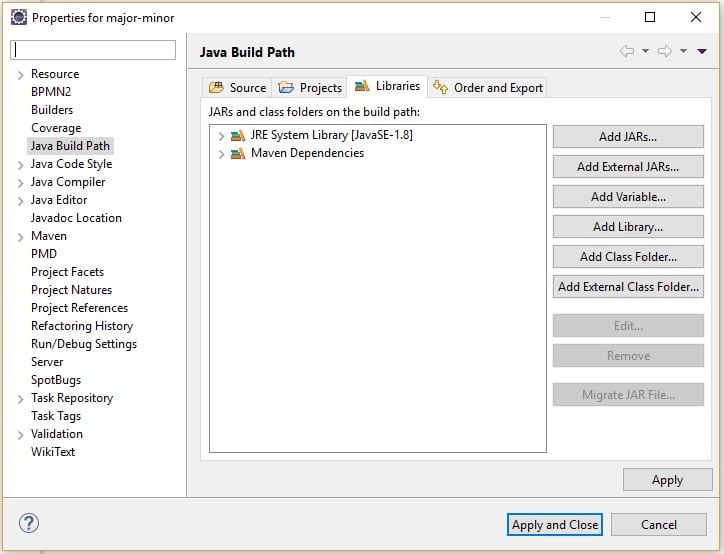
Now let's choose Alternate JRE and point to our Java 11 installation:

At this point, our application will run against Java 11.
4.2. Changing the Compiler Level
Now let's look at how we can change our target to a lower level of Java.
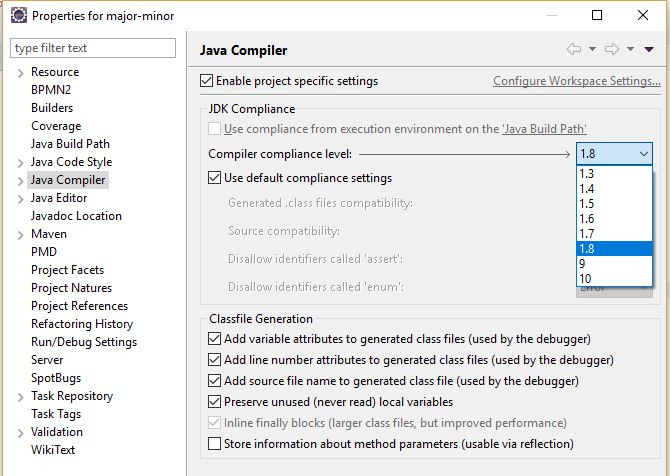
First, let's go back to our Project properties, then Java Compiler, and then check Enable project specific settings:
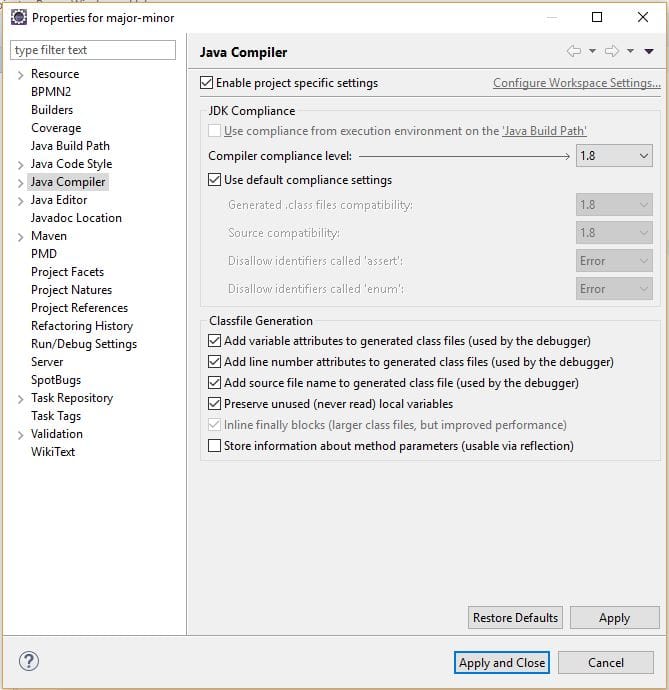
Here we can set our project to compile for earlier versions of Java and customize other compliance settings:
5. IntelliJ IDEA
We can also control the version of Java we're using for compiling and running in IntelliJ IDEA.
5.1. Adding a JDK
Before we do that, we'll see how to add additional JDKs. Let's go to File -> Project Structure -> Platform Settings -> SDKs:

Let's click the plus icon in the middle column, select the JDK from the drop-down, and select our JDK location:
<iframe data-google-container-id="6" data-load-complete="true" frameborder="0" height="1" id="google_ads_iframe_/15184186,7114245/baeldung_incontent_2_0" marginheight="0" marginwidth="0" name="google_ads_iframe_/15184186,7114245/baeldung_incontent_2_0" scrolling="no" title="3rd party ad content" width="1"></iframe>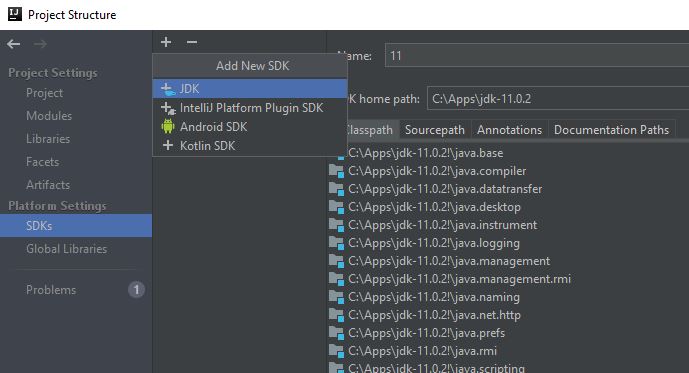
5.2. Changing the JRE
First, we'll look at how to use IDEA to run our project on the newer JRE.
Let's go to Run -> Edit Configurations… and change our JRE to 11:
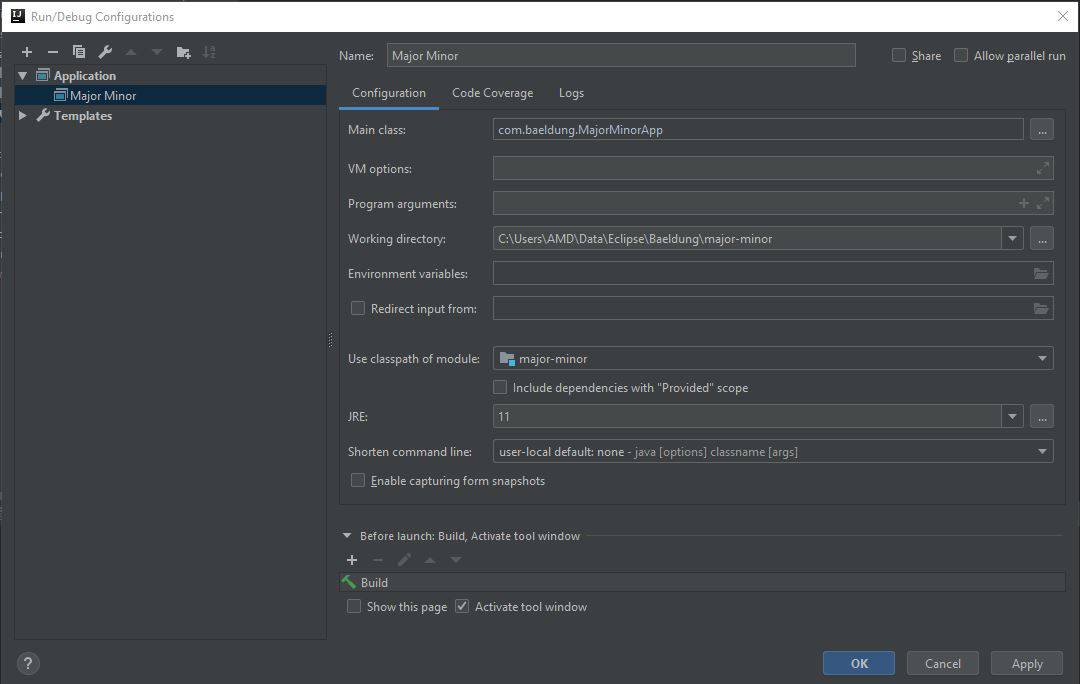
Now when we run our project, it will run with the Java 11 JRE.
5.3. Changing the Compiler Level
If we're distributing our application to run on a lower JRE, we need to adjust our compiler level to target the older version of Java.
Let's go to File -> Project Structure… -> Project Settings -> Project and change our Project SDK and Project language level:
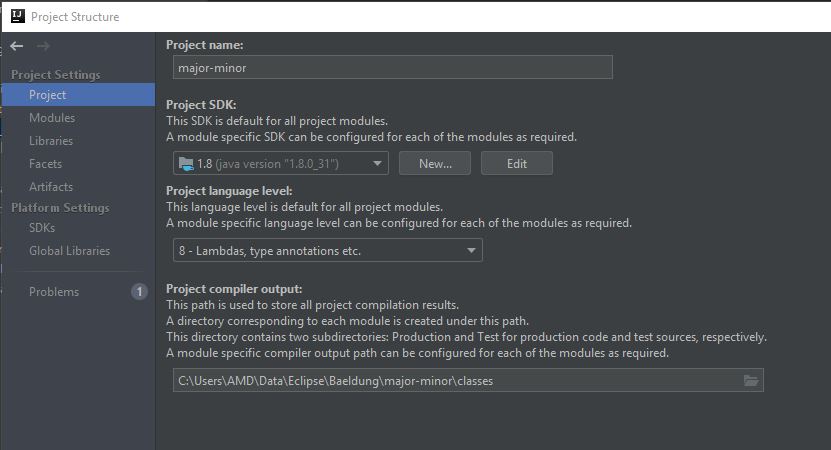
We can now build our project, and the class files generated will run on Java 8 and higher.
6. Maven
When we build and package a file in Maven, we can control the version of Java we target.
When using Java 8 or older, we set the source and target for the compiler plugin.
<iframe data-google-container-id="7" data-load-complete="true" frameborder="0" height="1" id="google_ads_iframe_/15184186,7114245/baeldung_incontent_3_0" marginheight="0" marginwidth="0" name="google_ads_iframe_/15184186,7114245/baeldung_incontent_3_0" scrolling="no" title="3rd party ad content" width="1"></iframe>Let's set the source and target using compiler plugin properties:
<properties>
    <maven.compiler.target>1.8</maven.compiler.target>
    <maven.compiler.source>1.8</maven.compiler.source>
</properties>
Alternatively, we can set the source and target in the compiler plugin:
<plugins>
    <plugin>
        <artifactId>maven-compiler-plugin</artifactId>
        <configuration>
            <source>1.8</source>
            <target>1.8</target>
        </configuration>
    </plugin>
</plugins>
With the –release option added in Java 9, we can configure that with Maven as well.
Let's use a compiler plugin property to set the release:
<properties>
    <maven.compiler.release>8</maven.compiler.release>
</properties>
Or we can configure the compiler plugin directly:
<plugins>
    <plugin>
        <artifactId>maven-compiler-plugin</artifactId>
        <configuration>
            <release>8</release>
        </configuration>
    </plugin>
</plugins>
7. Conclusion
In this article, we learned what causes the java.lang.UnsupportedClassVersionError: Unsupported major.minor version error message, and how to fix it.
标签:lang,JRE,Java,how,Fix,How,version,run,our 来源: https://www.cnblogs.com/kungfupanda/p/16683775.html
本站声明: 1. iCode9 技术分享网(下文简称本站)提供的所有内容,仅供技术学习、探讨和分享; 2. 关于本站的所有留言、评论、转载及引用,纯属内容发起人的个人观点,与本站观点和立场无关; 3. 关于本站的所有言论和文字,纯属内容发起人的个人观点,与本站观点和立场无关; 4. 本站文章均是网友提供,不完全保证技术分享内容的完整性、准确性、时效性、风险性和版权归属;如您发现该文章侵犯了您的权益,可联系我们第一时间进行删除; 5. 本站为非盈利性的个人网站,所有内容不会用来进行牟利,也不会利用任何形式的广告来间接获益,纯粹是为了广大技术爱好者提供技术内容和技术思想的分享性交流网站。